Friday, January 28, 2011

Baked Oatmeal & Rice Granola Balls


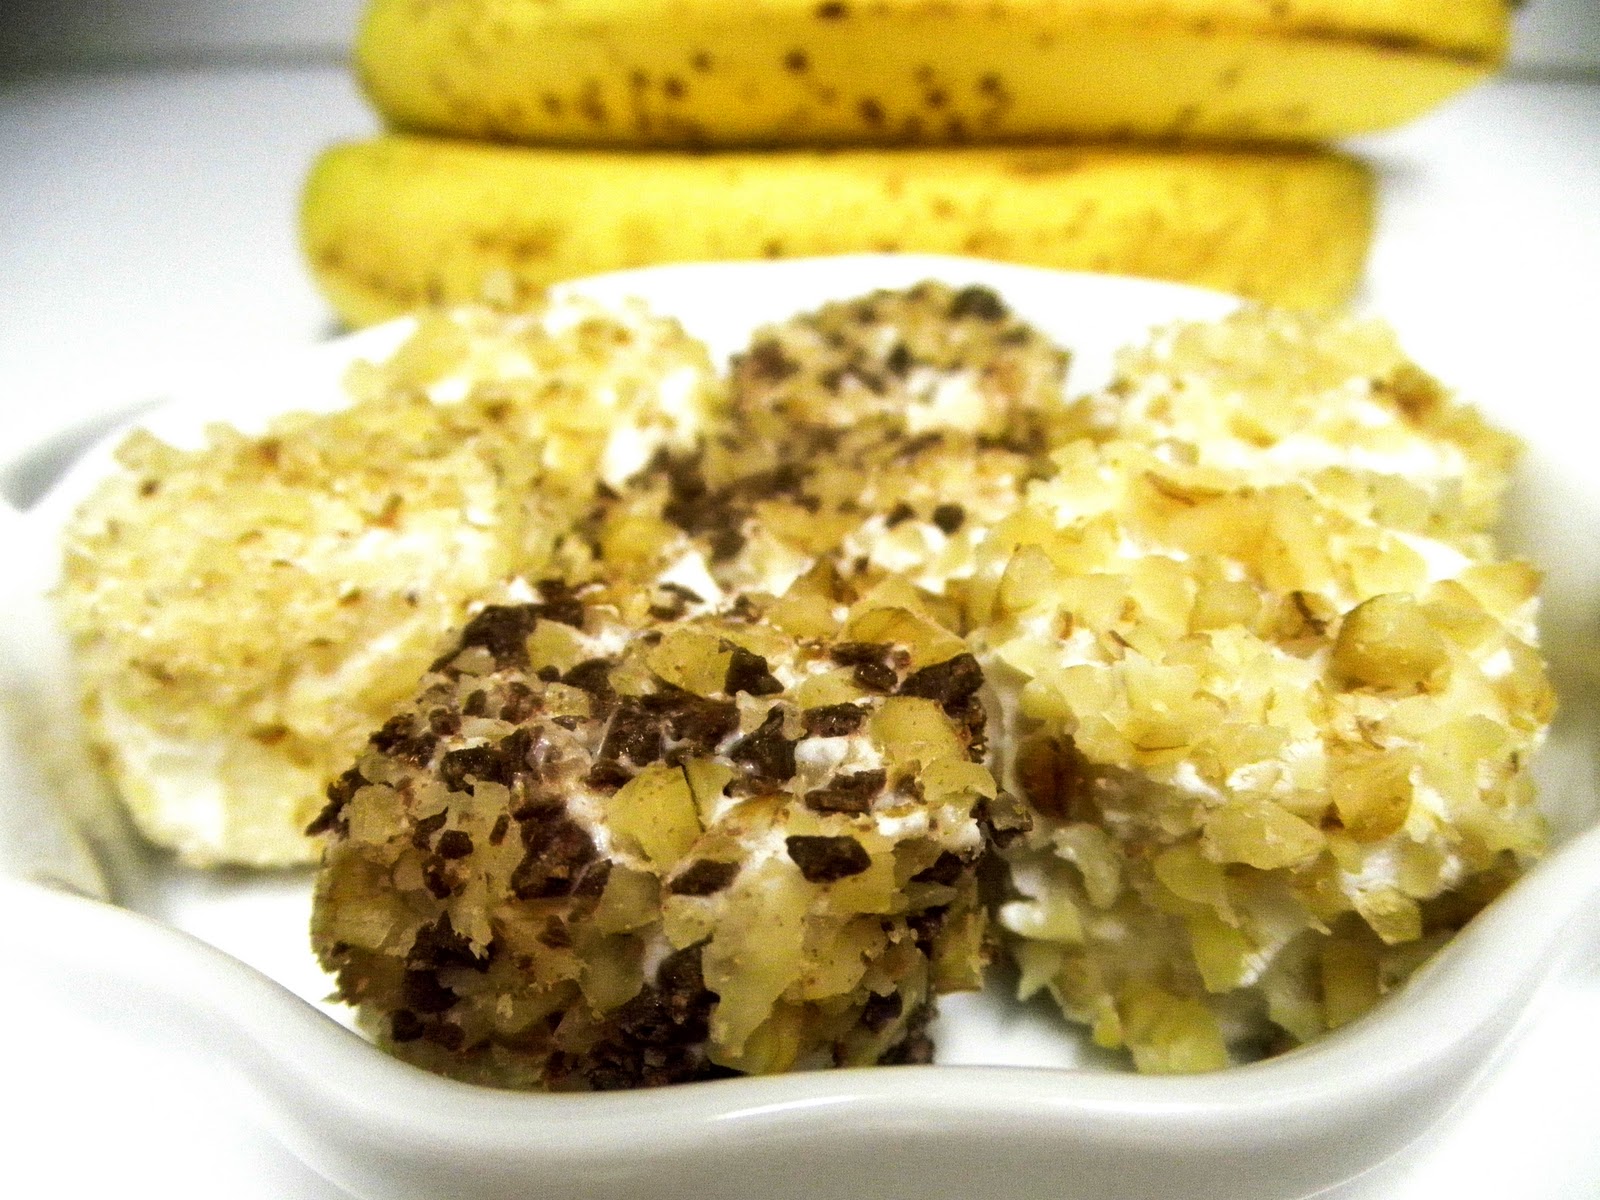
Used dark chocolate Hershey pieces for the balls, but I had pretty pink M&Ms for decor


Not quite Valentine's Day yet, but I was in a pinky mood this morning. 

I like making my own granola bars because I can control what goes into them.  That means I can reduce the sugar, weird chemicals, and all that icky nonsense. I'll admit, I put dark chocolate Hershey pieces in these because I've been craving chocolate all week, but I typically eliminate all artificial sweeteners. =) 

I usually use oatmeal and whole wheat flour as the base, but I wanted to try something new.  I thought an interesting way to add some chewiness to the granola balls would be to grind up some sweet brown rice until it reaches a floury consistency. Thankfully, it worked! Now my only problem was the Hershey pieces that I added in because the color and coating melted in the oven. Maybe this is a sign that I should have eliminated the dark chocolate....sigh. Oh well, doesn't bother me! 

Next time I would just stick with the bars instead of the balls unless I was making it with someone...took more time that I thought! All you have to do is dump the whole thing on a cookie sheet, press down hard, and pop it in the oven.


About to pop the mini muffin pan into the oven


Baked Oatmeal & Rice Granola Balls:
 Serving Size = 32 balls

Ingredients:
2 cups old fashioned oatmeal (rolled oats)
1/2 cup sweet brown rice, rinsed & finely ground
1/4 cup whole wheat flour
1/4 cup wheat bran
1 tsp cinnamon
1/4 tsp nutmeg
2 eggs
1/2 cup water
1 tsp vanilla
1/2 cup peanuts, light salted*
1/2 cup roasted almonds, lightly salted*
Dark chocolate Hershey pieces or M&Ms (optional)
* I was too lazy to roast my raw almonds (and I had no raw peanuts), but if you use raw nuts, add 1 tsp kosher salt


1) Preheat oven to 350F.
2) Large bowl: Mix dry ingredients
3) Medium bowl: Mix wet ingredients
4) Add wet ingredients to dry ingredients. Mix well!
5) Grab a spoonful of the mixture + 2 chocolate pieces, and roll up into a tight ball. Place into a mini muffin pan to avoid having the balls roll all over the place. Makes approximately 32 granola balls
6) Bake 15-16 minutes


Cute little nutty ball =)

--------------------------------------------------------------------------------------------------------------
Nutrition Facts: Baked Oatmeal & Rice Granola Balls w/o Chocolate
Serving Size= 1

Calories: 59*
Fat: 2.5 g*
Carbohydrate: 6.3g
Dietary Fiber: 1g
Protein: 2.6g

* Nuts consist of a lot of calories and fat, but don't forget it's GOOD fat. Nuts are GOOD FOR YOU in moderation, of course!

--------------------------------------------------------------------------------------------------------------


Monday, January 24, 2011

Eggplant "Eggs Benedict"


Perfectly Poached Eggs

Yes, I'm in that eggy mood. I eat eggs for breakfast almost everyday (yes, I eat a LOT in the morning...haha), but I always need to change it up so I don't get bored. It also helps that they're nutritious and packed with vitamins and minerals...not to mention, they're inexpensive! That's always a bonus for me. =)

This is how I made my version of an Eggs Benedict. I was too lazy to buy ham, so I just substituted it with a slice of eggplant..kinda wish I had the ham, though.... I also wanted to cut down on the yolk because 1 yolk per eggs benedict is enough for me, so I substituted the Hollandaise sauce with some mustard & red wine vinegar sauce.  On the English muffin, I spread on some yogurt-dill sauce as well to add a tangy twist and added a slice of tomato.

I'm sure there are many different ways to make the "perfect" poached egg, but this is the way I make it.  It always seems to work out perfectly, so that's all that matters to me.


Poaching
Poached Egg

1 egg
1 tbs vinegar (approx.)

1) Bring water to almost boiling at around medium to medium-high heat. Add vinegar to water because it helps the egg whites hold together better. That way, you can avoid those fancy poaching gadgets!
2) Crack egg into a small bowl. Be careful not to break it
3) Gently swirl the water in a circular motion to create a whirlpool in the middle. Slowly pour the egg into the center of the whirlpool so it doesn't lose its shape
4) After about a minute, I usually nudge the bottom of the egg to lift it off the bottom and float around
5) Let it cook for about 3-4 minutes for a runnier yolk or up to 7 minutes for a firmer yolk.
6) The egg will continue to cook as you take it out and plate it, so if you can't serve it immediately, place it in ice cold water to stop it from cooking further


Yogurt-Dill Sauce

Estimates:
1 cup Greek yogurt
2 tbs + 1 tsp fresh dill, chopped
2 tbs cucumber, chopped
1 large clove garlic, minced
1 tsp fresh lemon juice
1 tbs olive oil (optional)
1/2 tsp lemon zest
Salt & Pepper to taste


Runny yolk- Just the way I like it


A Vegetarian Eggs Benedict w/ Mustard-Red Wine Vinegar Sauce

Poached egg
English muffin
Cooked & seasoned eggplant (or meat)
Tomato
Yogurt-dill sauce
Mustard
Red wine vinegar
Sriracha
Salt & Pepper


 Sriracha is a necessity

Saturday, January 22, 2011

A Savory Oatmeal Breakfast

Drop an egg in your oatmeal for a creamy texture


Almost every time I make oatmeal (which is quite often), I always add in the same basic ingredients: egg, wheat bran, and cinnamon. This makes for a nutritious breakfast/lunch/snack because you get the extra protein from the egg (which also adds a more creamy texture), more fiber from the wheat bran, and an nice kick from the cinnamon. In fact, 1/2 tsp of cinnamon is shown to help lower cholesterol and reduce blood sugar levels, so eat your cinnamon!!

So what type of oatmeal should you use?  Personally, I stick to my 5 minute old fashioned (rolled) oats because I don't prefer the mushy texture of instant (quick) oats, and I don't have 30 minutes in the morning to spend making steel cut oats.  By the way, Costco sells old fashioned oats in bulk...and when I say bulk, I mean BULK for about $6. Can't beat that!


P.S. If you can help it, do NOT add sugar to your oatmeal. Try to use the natural sugars from fresh/frozen fruits or even honey if you must. I also found that using a 1 whole cup of plain almond milk to cook your oatmeal in tastes delicious! It gives it a creamy, nutty, and slightly sweet taste. YUM.


Crunchy almonds, yum!


Savory Oatmeal:
 Serving Size = 1

Ingredients:
1 cup water*
1/2 cup old fashioned oatmeal (rolled oats)
1 egg
1 tbs wheat bran
1/4 tsp cinnamon
1/2 tsp light soy sauce (to taste)
1/4 tsp sesame oil (to taste)

Sesame seeds
Scallions
Slivered almonds (optional)
Red pepper flakes (optional)

* You can always do 1/2 cup water and 1/2 cup milk. I wouldn't recommend 1 cup milk unless you're using almond milk. Otherwise, it sticks to the saucepan like crazy

1) Medium heat: Combine water and milk until bubbly (not boiling). Pour in oatmeal and mix. Stir every so often so the oatmeal doesn't get stuck onto the bottom of the pan
2) After about 3 1/2 minutes, crack an egg into the center of the saucepan (with the oatmeal), break the yolk, and mix it into the oatmeal
3) After 1 1/2 - 2 minutes, mix in wheat bran, ginger, soy sauce, and sesame oil. Let it sit for about a minute off direct heat.
4) Transfer to bowl, and sprinkle with sesame seeds, scallions, slivered almonds, and whatever else you want!


------------------------------------------------------------------------------
Nutrition Facts: Savory Oatmeal (w/o almonds)
Serving Size= 1

Calories: 254
Fat: 9.25g*
Carbohydrate: 34g
Dietary Fiber: 7.6g
Protein: 12.6g

* You can reduce the fat if you eliminate the yolk
------------------------------------------------------------------------------

Monday, January 17, 2011

A Quick Fix Banana Ice Cream

That's how I like to start my day! Some good ole frozen banana slices

A banana a day keeps the doctor away, right?

Just thought I'd share: This is the first thing I eat every morning before my actual breakfast. A frozen banana with walnuts (not so much the chocolate, but just threw that in today for fun!).  Now that I've done this for quite a while, I can't seem to enjoy a regular banana as much as I do a frozen one. It's definitely a healthier alternative to that fatty yet delicious Cold Stone banana ice cream, and it tastes pretty darn good! I'd say, the best of both worlds.


Use FAGE or Chobani Greek Yogurt (Plain, of course)

Every night, I slice up a banana and stick it in the freezer. Depending on what mood I'm in, sometimes I'll roll the banana slices in plain Greek yogurt (high in protein, low in sugar), then roll them in chopped walnuts using my handy dandy chopper.  Most mornings, I just munch on plain frozen banana slices and eat them with walnut halves. Either way, a delicious start to my day!

By the way, I found that riper bananas, the ones with the dinky brown dots, taste better when frozen. The pretty yellow ones are a little too firm and aren't as sweet when frozen.


Found random shot glasses, so I thought I'd make them useful


FYI...Just because I like to know the nutrition facts of what I eat!

---------------------------------------------------
Nutrition Facts: Banana
Serving Size= 1 large banana, raw

Calories: 121
Fat: 0g
Carbohydrate: 31g
Dietary Fiber: 4g
Sugar: 17g (all natural!)
Protein: 1

Vitamin B6:  .5mg (25%)
Vitamin C 11.8mg (20%)
Potassium:
487mg (14%)
Manganese: .4mg (14%)
----------------------------------------------------

Nutrition Facts: Cold Stone's Banana Ice Cream 
Serving Size= "I Like It"

Calories: 377
Fat: 21.8g
Cholesterol: 86mg
Carbohydrate: 39.8g
Dietary Fiber: .4g
Sugar: 34.3g (added sugar!)
Protein: 5.6g
-------------------------------

.

Saturday, January 15, 2011

Pomegranate- Chocolate Chip Mochi Bundt CAKE


An Overnight Pomegranate-Choco Chip Mochi Bundt Cake

I dedicate this to all the mochi lovers out there who want to spice up their mochi lives.  Here's a Pomegranate-Choco Chip Mochi Bundt Cake for you. I need to think of a shorter way to say that...a Pomo-Choco Mochake?

I thought a mochi bundt cake would be a fun little experiment just because I'm in that mochi mood again. I  played around with the ingredients and crossed my fingers...and voila. It turned into something! *phew*

It's like an optical illusion. It looks like a cake, but it's not!...well, sorta...I'd say, texture wise, it is a cross between your typical mochi and perhaps a pound cake? Maybe an 85%-15% ratio since the mochiko made the inside more chewy, sticky, and obviously more dense than a normal cake. My favorite part was the beautiful brown crust of the cake! What's great about this cake is that, in my opinion, it tasted even better the next morning! The inside of the cake had time to set overnight and turn more chewy, so the consistency improved during those hours. Who knew?? I guess that would make this cake a perfect "make-ahead" dessert. =)


Fresh out of the oven last night


This is what the cake looked like fresh out of the oven last night. It's not as "gummy" and mochi-like quite yet (like the main picture above). It was more on the moist and sticky side. Still delish, but I personally liked it better this morning! =)


After sitting overnight


Pomogranate-Chocolate Chip Mochake

1 box Mochiko (approx. 3 1/2 cups)
1 stick butter, melted
1/2 cup applesauce
1/3 cup white sugar
1/3 cup brown sugar
4 tbs honey
1 1/2 cup soy milk (or any other type)
4 eggs
1 tsp vanilla
2 1/2 tsp baking powder
1/2 tsp salt
1 tsp cinnamon
1/2 cup pomegranate
1/3 cup chocolate chips


1) Preheat oven to 350 F. Grease bundt pan
2) Large bowl: Mix melted butter, and sugar. Add applesauce, honey, and vanilla. Beat in eggs and add milk
3) Medium bowl: Mix mochiko, baking powder, salt, and cinnamon. Gradually mix in dry ingredients into wet ingredients. Dough will be thicker than regular cakes!
4) Mix in pomegranate and chocolate chips. Pour it into the pan and smooth it out. Pop it in the oven for about an hour or until your toothpick comes out clean! Let it cool for about 5 minutes. Serve or sit overnight for best results!


After baking in the oven for about an hour


I was actually surprised at how easily the cake popped out of the pan. It was one of those 1-2-3 flips where the cake just plopped down onto the plate. Success! My mom was worried that the cake would get stuck into the pan since it's made out of Mochiko, but thank god for the magic of butter in cakes.


Purty bundt cake! Would've glazed it, but I was too tired and lazy to


If I make this again, which I probably will, I might try to decrease the amount of butter to 3/4 stick. I'd try some other fruits like blueberries or cranberries...and maybe throw in some walnuts! I also have some coconut milk, so that could give the cake a nice coconut-y twist.


Last night's midnight snack


Tuesday, January 11, 2011

For the Health Conscious: Eggs & Oats Pancakes w/ Clam


Eggs & Oats Pancakes with clam. Kimchi on the side


I don't know about you, but according to all of those commercials, many people do not consume enough fiber each day.  In fact, the recommended daily intake of fiber is about 20-35 grams.  To solve this "nationwide dilemma," I thought this eggs & oats "pancake," if you will, would be a great way to incorporate some extra fiber into your diet.  Wait...oatmeal?? Yes, oatmeal! It's an excellent source of fiber, protein, and other nutrients, AND since it's blended into everything, it enhances the texture. I chose to dip it in soy sauce + vinegar and sriracha + ketchup because I went fairly light on the sodium.

P.S. Excuse my random kitchen experiments with whatever I can find in the fridge. Now I just post to get away from studying when my brain's fried. Thanks to the CPA exam, I'm currently hibernating and kissing my happy days goodbye.=(


Eggs & Oats Pancakes w/ Clam

 4 eggs (4 whites, 3 yolks)
1/2 cup rolled oats
1/2 cup clams, chopped
1/4 cup wheat bran 
1 garlic, chopped
1/4 tsp ground ginger
1/4 tsp sesame oil  
2 tbs scallions
Salt & pepper to taste
*1 tbs Soy sauce (optional, but probably not needed if dipping into sauces)
*3 cups spinach (I like it with spinach, but I didn't have any in the fridge...fail)

1) Blend everything but the clams and scallions into the blender. Let it sit for about 3 minutes. Mix in the clams.
2) Heat the skillet to low-medium. Using a large spoon, gently pour batter onto skillet and top with scallions. Cook on both sides until lightly browned and cooked through (about 1-2 min per side)

-------------------------------
Nutrition Facts:
Serving Size= 5 pancakes
Servings per recipe = 2 

Calories:  266
Fat: 9.85g (good fat!)
Carbohydrate: 22.5g
Dietary Fiber: 5g
Protein: 18
-------------------------------

Sauce 1: Soy sauce, vinegar, red pepper flakes, sesame seeds
Sauce 2: Sriracha, ketchup


oops! excuse my shadow...=P


Thursday, January 6, 2011

Egg-in-a-[Bagel] Basket

Egg-in-a-[bagel] basket

 Breakfast is my favorite meal because I'm always hungry when I wake up. Let me just say that I loveee making this "Egg-in-a-basket" or "Egg-in-the-hole" breakfast because it's a fun and easy way to be creative with your basic toast and egg combo. Some days I like a runny yolk, but most days I like it a little more set yet soft.  I usually make this with a slice of bread (like most people), but since we had bagels sitting around, I decided to try it out with a bagel. I figured it'd look better anyway since the egg is, well, a circle.

Ingredients
1/2 bagel (cut as shown)
1 egg
1/2 tsp grated parmesan
1 tsp scallions
1/4 tsp dried seaweed
Dash of salt + pepper
1 tbs tomato
1 tsp onion
1 tsp cilantro
Dash of balsamic vinegar

1) Cut the bagel in half and cut a very thin slice off the top to make both sides flat. Use a knife and slice out an circle-oval shape from the center. The center piece can be used to dip into the yolk
2) Heat pan on medium-low and add butter, oil, or cooking spray to pan
3) Lightly toast the top side of the bagel for about a 30 seconds to a minute, then flip over. Crack 1 egg into the middle of the bagel hole. Meanwhile, toast the smaller bagel piece on both sides
4) Cover with lid to hold in steam for about 6-8 minutes depending on how done you want the yolk.
5) Season and garnish with your favorites toppings!


Prepping the bagel

Semi-runny yolk...Just the way I like it =)

Layers

Tuesday, January 4, 2011

Best Thing I Ever Ate: Mochi


Mochi w/ Red Bean Paste

We all love mochi, but have you ever tried making it from scratch? If you're ever short on time and need to make a quick and easy dessert for your friends or guests, this should be your go-to dessert! Once you get into that mochi grind, you'll be rolling out mochi cakes like it's your job. Trust me.

Every single person out there should have the opportunity to experience the mochi sensation. Seriously. I just love how sweet and chewy these rice cakes are, especially when they're stuffed with something like red bean paste, sesame, ice cream, chocolate (nutella!!), or fruits.  Mochi cakes are also delicious when rolled in and coated with crushed nuts, coconut, cake crumbs, bean powder, and etc. That's how versatile they are! They make the perfect dessert and snack, and they're SO easy to make! I didn't have all my weapons with me in the kitchen, but I'd definitely use some food coloring next time to make some cute pink, green, and purple mochi cakes! =)

P.S. I seriously need to cut down on all the sweets, but for some reason, I constantly have this urge to make desserts. Maybe it's because my sister's home, so I blame her. She has a sweet tooth like no other, and I think it's rubbing off on me.

Must motivate myself to get in that workout grind again!!


My big bite =)


Mochi w/ Red Bean Paste:
 Serving Size = Approx 20 mochi cakes

Ingredients:
2 cups glutinous rice flour (Mochiko)
2 cups water
1/2 cup sugar
1 cup red bean paste
1/3 cup cornstarch
1/4 - 1/2 tsp cinnamon
*Use 1 cup sugar if you like it on the sweeter side

1) Mix red bean paste with cinnamon in a small bowl. Make balls with a teaspoon and set aside.
2) On a baking/cookie sheet, spread cornstarch evenly (or whatever coating you prefer)
3) Mix glutinous rice flour and sugar in a medium size bowl. Add water and mix well until blended. Cover with a damp paper towel and microwave for 2 minutes
4) Take the bowl out and mix for a few seconds again. Cover and microwave again for another 2 minutes. Mix the dough.
5) Use a plastic glove if you wish, and coat your hands with cornstarch. Take a heaping spoonful of the dough and pat it back and forth in your hands until flat. Be careful because it can be very hot!
6) Once flat, you may pinch the circumference, put a ball of bean paste in the center, and start folding over at opposite ends. After completely folded, roll the mochi cake around in your hands adding cornstarch as needed.
7) Repeat steps 5-6 until done. Ready to eat right away!


Packed for the bf. Why do I find mochi to be so adorable? I love poking them.

Come to think of it, maybe I should try dipping these in sriracha sauce next time. After all, everything tastes better with sriracha, right??

.